How to set up Netgear Nighthawk RAX120 for nbn FTTP
Please follow the steps below to set up your Netgear Nighthawk RAX120.
- Ensure your nbn Connection Box is turned on.
- Plug an Ethernet cable from UNI-D1 on your nbn Connection Box into the Internet/WAN port on your Nighthawk router.
Note: If UNI-D1 doesn't work, try each UNI-D port.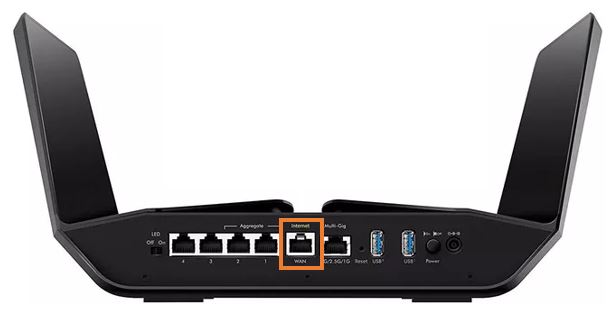
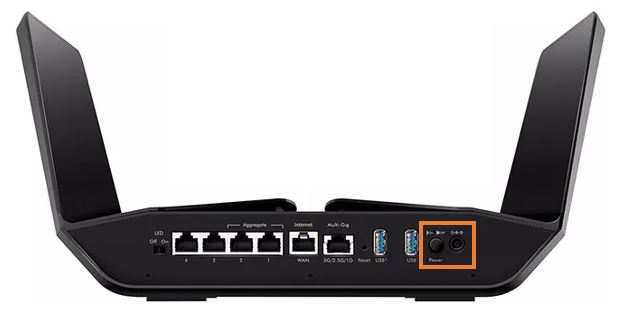
- Plug in the power cable and turn your Nighthawk on using the Power button.
- Connect a device to your Nighthawk via WiFi or Ethernet cable and go to http://192.168.1.1 or http://www.routerlogin.net in your browser.
- Log in with your Nighthawk username and password. By defaults these are:
Username: admin
Password: password - Select Internet Port for WAN Preference.
- Select PPPoE (PPP over Ethernet) from the Encapsulation drop down.
- Enter your iiNet username and password.
- Click Apply.
- If your nbn plan was activated before 1 March 2023 or you have nbn Phone included in your service, more settings are needed:
- Select Advanced, Advanced Setup and VLAN/Bridge Settings.
- Enable VLAN/Bridge Setup check box.
- Select By VLAN tag group.
- Click Add.
- Enter a Name for the VLAN (e.g. "Internet").
- Enter 2 in VLAN ID.
- Enter 0 in Priority and Add.
- Click Apply.
Your Netgear Nighthawk RAX120 should now be online. If you're still having issues, please see Improving WiFi Signal or call us on 13 22 58 for further assistance.